Add customization to entity form
- Create a js file with a vendor prefixed function which accepts a single parameter called
executionContext:
function abc_my_customization(executionContext) {
  const formContext = executionContext.getFormContext();
  formContext.data.entity.attributes.forEach(function(attribute) {
    const attributeName = attribute._attributeName;
    const label = formContext.getControl(attributeName ).getLabel()
    const value = attribute.getValue();
    console.log(label + ": " + value);
  });
}- See docs for more info on using the Client API object model (i.e. execution context, form context, grid context, etc…)
-
Navigate to make.powerapps.com > Ensure the correct Environment is selected (in ribbon) > select Solutions > and select the solution which will contain your customizations.
-
Open new web resource form: Select + New > Other > Web Resource
-
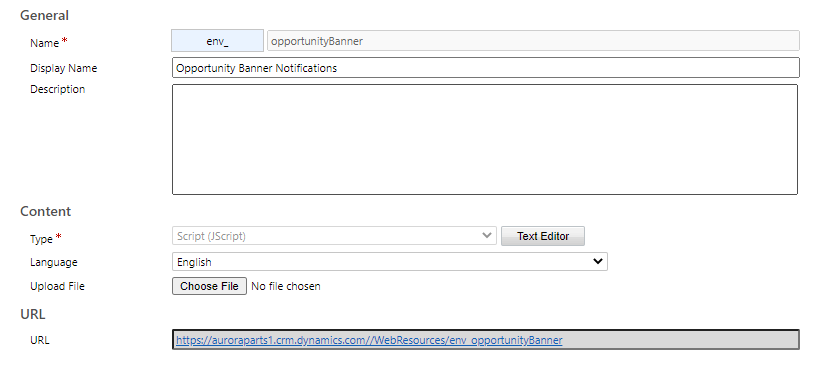
Complete new web resource form:
- Name: i.e. “
FormCustomization” (hint: be descriptive but terse) - Display Name: i.e. “
Form Customization” - Type: select JScript
- Upload File: select your js file
Then select Save, and then Publish.

Note: When making updates navigates to the JS, navigate to this form (aka find the web resource in the list of solution resources), upload or use the text editor to update the code, select save, and then select publish.
- Attach the web resource to the entity form:
Navigate to the associated entity in the list of resources for the solution.

Select the Forms tab and then select the Main form.

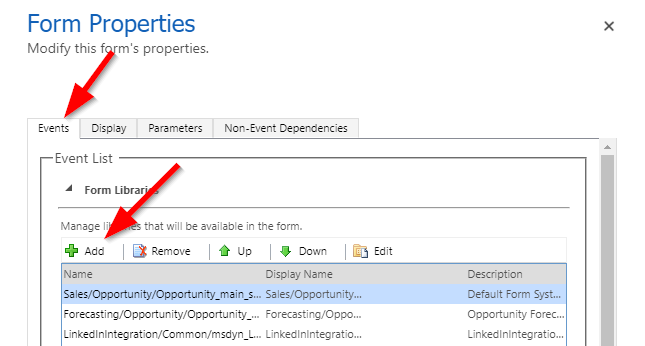
Select Switch to classic and then select Form Properties.
On the Events tab > select Add under the Form Libraries section.

Search for the web resource by the name you entered earlier, select the checkbox to the left of the resource, then select Add.
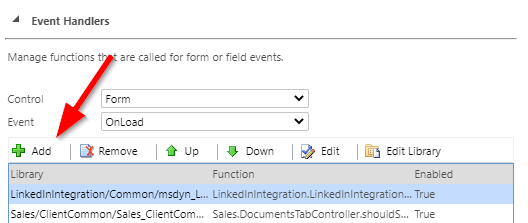
Next, in the Event Handlers section select *Add (note, keep the Control defaulted to Form** and “Event” defaulted to “OnLoad” unless you know what you’re doing).

Fill out the Handler Properties form:
- Library should be the name of the web resource,
- Function enter the name of the function in the js file
- Pass execution context as first parameter check this checkbox
Then select OK.
Select OK to confirm the Form Properties form. Select Save and then select Publish.
Note: the web resource is now attached to the form. Any edits the the web resource (aka the JS) will be done back on the web resource page.